Thursday, May 26, 2016

little side table redone - again!


So, that golden blue blur from the last post finally dried and found its place in one of the corners. I say finally, cause it took me way over a year to get it to the current state. We actually bought it even before we moved to the previous house.
It was sad wobbly clunker with polish peeling off, termites happily nesting inside and looking more like firewood than an adorable little side table that it is.


First, I did all the boring stuff I always do: sanding, getting read of termites, putting primer and so on. Then I painted it turquoise. I was going through a major: "we live next to the sea so let's paint everything in sea colors" phase. But I didn't like it turquoise, so I spraypainted it gold.


I didn't like it gold either. I got out some sandpaper and gave it more layered look getting the turquoise show through the gold. That was more like it, but not really "it" yet. To be honest, I wasn't quite sure how I wanted it to look so I just turned it into a bar table and it stayed this way until about a week ago.


I got some adorable decoupage tissues which I thought would be just perfect. But when I was done sticking and mod podge -ing, I wasn't really happy with the result - what a shocker!


I almost thought that the poor table was doomed to ugliness, but I figured I'll give it one more try. With some acrylic paints, I tried to hide the tissue edges, merge the pattern part with the plain one, bring out the flowery motif and... I finally got to the "it" I was hoping for, for over a year!


I really love how it turned out. It has this amazing texture of a crackled old painting (thanks to my inexpertly applied tissues, no doubt) and weathered look of a piece of furniture which has been serving people for centuries and then stood somewhere abandoned and forgotten. You can almost see it in some elegant sitting room and then, as the paint starts to peel off, moved to less and less representative parts of the house. And there it would be discovered, after decades passed, by someone who would appreciate it again.


Now I just need to give it proper company - maybe some pictures, maybe a lantern or a rug?
I love that we are finally at the stage of "moving i" when we can think about hanging pictures and not unpacking boxes!


Thursday, May 19, 2016

Litte tings 2


The off-season has begun in earnest. We already had a couple of those unbearable pre-monsoon days. Have you ever experienced a heat so overwhelming and sticky, you liquefy on the spot? That's what I'm talking about - only worse! We escaped to the beach to find the clear blue sky turned milky white, yellow sand turned gray and the peaceful waters turned to stormy waves. Suddenly the jagged rocks became more noticeable and sinister looking. But the breeze was a lifesaver! the only place  you can catch a breath in!


But the off-season is not all bad. With it comes the parade of the local fruits, which is not only delicious but also quite surprising. For example, I had no idea how cashews grow until we moved to Goa. Though I can't say much for the smell, they do look quite decorative!


In the meantime, and in the spirit of cottage life, I took up bread making. I always used to skip the recipes that stretched the process over two whole days, but recently I decided to try one and I got completely hooked! It's such fun. Plus, is there anything better than the smell of bread baking in early hours of the morning.?!


Well.. there is always the less appetizing though equally satisfying smell that concludes sometimes gruelling process of creation, that of the varnish drying on the recently completed project. Growing up around artists and then studying art myself, I have a great sentiment for all those chemical smells. If it wasn't downright kooky, I would have turpentine as an air freshener and oil paint as perfumes!

Saturday, May 14, 2016

Passion for yogurt & granola


Lately, I'm really into homemade dairy products. I'm not buying a cow or anything, but I do make cottage cheese and faux mascarpone on a daily basis. It was only natural, that I tried my hands on some home-made yogurt.

To be completely honest, I don't think I'll be repeating the experiment in a hurry, but only because we can get delicious, all natural yogurt in the local store at a comparable price.
From what I've read, it's quite tricky to get real yogurt with no funny additives but with natural cultures nowadays. I'm in no way nutrition expert so all I'll say here is: study the labels!

The best way to make your own yogurt is, of course, to get the bacteria cultures, but you can make do with a spoonful of good natural yogurt and some milk!
The key is temperature, all the rest is just waiting.


Home-made yogurt
1/2 liter milk
2-3 spoons of natural yogurt with bacteria cultures

Warm the milk to approx. 40 degrees (warm but not hot) and mix with yogurt. Keep it warm for 7-8 hours or overnight. Ideally, it should be left in 30-degree temperature.

As far as I know, there are some devices for home yogurt making, but I'm not so committed to this task to own, or even research one. You can leave it in a barely warm oven, on the balcony (if it's warm and sunny), wrap it in a blanket, pour into warm thermos etc.

Once it's ready keep it in the fridge. Of course, you can double or triple the ingredients- I read somewhere that home-made yogurt will last up to two weeks!
Oh, and you can make next one or two batches from this one, later on, you have to get the store bought yogurt again.


While I'm happy with store bought yogurt, I'm completely obsessed with home-made granola. It's my biweekly ritual to prepare a huge jar for our breakfasts and guilt-free snacks

Because I make it so often, I change the proportions and ingredients - and you can do the same - but here is the basic recipe:

400 g oats
100-200 g seeds (sunflower, pumpkin, sesame,  etc)
100-200 g chopped nuts (walnuts, almonds, hazelnuts etc)
100 g desiccated coconut (or other nuts)
150 g liquid honey (or sugar syrup)
2-3 spoons oil (sunflower, almond, coconut etc)
150 pureed apple

+ 100-200 g dried fruits (raisins, goji berry, cranberry etc)

Mix everything (apart from dried fruits) together until it forms rough crumbs. Spread evenly on baking parchment and bake 30-40 min in 160 degrees.
Everything should be golden-brown, dry and crunchy.
Cool it down, mix in dry fruits and store in a tight lid container for a couple of weeks.


And now, when you have both your yogurt and granola, try it with some passion fruit!

Friday, May 6, 2016

The little things...


I remember as a child, I was reading and re-reading books like Six Bullerbyn children, till they parted their covers. I couldn't get enough eventhough nothing big ever happend there. Nothing ever hapened and yet every day was a discovery, an adventure!
Something about our new cottage life reminds of those childhood books. I'm not sure why it feels different now, but I'm not gonna question that and enjoy it one day at the time. Just like in my books - nothing really happens (if you manage to forget about the FRO shenanigans), but it's fun just the same!


For example, we have a frog living in our bathroom door frame. When I first saw her, I thought it was just a one-time sighting, I even consider throwing her our, but she was quite cute and pretty color too. Well, I'm not sure it's a "she" - especially since she looks like Jabba the Hutt most of the time, but I like to call her Ursula nonetheless. As it turns out, she sleeps in the bathroom during the day and spends the nights hunting for insects. Once, I had to rescue her from our cats and some other time, the poor thing was forced to play dead in front of them until we realized what's going on. That's not just a frog anymore, it's a real character!


Another day we had a tiny natural disaster. A branch broke off from one of the mango trees and pulled our internet line. Obviously, it couldn't take the weight of the fruits- I've never seen such huge mangos! It used to spread widely, all the way to the well, with the heavy fruits hanging just above it, until, one day, it collaped, with the mangos almost purpousfully layed down on the garden table.


And then, I was making a no bake mango cheescake with a layer of mango musse, mango cream cheese and home made mascarpone. It actually isn't as time consuming as it sounds, especially if you use store bought mascarpone, but it takes a while and a whole lot of bowls just the same. And so, just when i was about to assemble all the three layers, I was loudly reminded that motherhood waits for no cheesecake. I dumped everything in the cake pan, and put it in the fridge hoping that at least it wont leak out. It didn't. It was delicious, if a little whimsical...


Sunday, May 1, 2016

OCI and the Foreign Regional Misinformation Office


Dealing with Indian government offices is like fighting mythological monster: you cut off one head - it will grow tree others!

After the pain of FRRO registrations, court marriage &its registration, extending and converting visa, applying and receiving PIO card (just to learn that  I have to go through the same process to convert it to OCI card), I finally had the holy grail - the infamous OCI! How naive of me it was to think that it is the end of our trouble!

When our son was born, we decided on Polish citizenship and OCI card for him. After all, how hard could it be to get OCI for someone who is half Indian? Well... I can tell you how hard: VERY!
First of all, we timed everything quite well according to all the official information: the registration of birth, applying for the passport and then visa, which, according to Indian embassy's website, takes approx. 2 weeks.
However, we were advised against applying for anything else than tourist e-visa because one of the consuls was absent and therefore there was a backlog in visa processing. In other words, there was no chance of getting a proper visa on time.

Looking back, I should've known just then, that the whole process will be full of complications!

We arrived in Goa and marched to the local FRO, to register, extend, convert - all the usual fun, and that's when the real problems started. First of all, e-visa is non-extendable and non-convertible. So, as they told us, we can stay for 30 days and then our baby boy will have to leave the country!

When we managed to convince them, that flying 3-month old back and forth across the continents isn't a good idea, they agreed to do all the extension/conversion magic provided that we submit all the documents. We had everything on hand - or so we though. Apparently a C-form is and always has been required.Funnily enough, during all my FRRO adventures, no-one ever asked me for a C-form, including Goa FRO. Not very surprising though, as they change their regulations and laws weekly plus the rules differ from office to office and from officer to officer!

Oh, and have I mentioned the cherry on top of FROs ineptness? After learning that my husband is from Rajasthan, the chief of the office told us "If I knew you were not from Goa, I wouldn't have agreed [to help you]". Unfortunately, in this little piece of paradise that Goa is, locals loathe outsiders and let it be known, every opportunity they get. Even so, hearing sth like this from government officer is a bit much!

Anyway, we got the "application under process" paper and were on the mission to get the C-form ASAP. Unfortunately, it is up to the landlord to file for it - supposedly they are obligated to do it whenever they rent to foreigners, but if they don't, nobody will say a word. After all, they are the locals, it's just the foreigners, the "outsiders" who get into trouble.

Apparently, the title of the house wasn't clear, so to get the C-form, our landlord had to apply for some other document from the court. That meant another trip to FRO, explaining why we didn't submit the documents yet. Surprisingly, we heard that that's not a problem and we can submit it later. Of course, at this point, I didn't believe them in the slightest. I knew it was a ticking bomb and apparently it just exploded.

We got a call that they can't help us after all, and our son will be required to leave India in order to apply for a proper visa. That was followed by the usual "we are not responsible for...". After all, not taking responsibility for whatever they say or do is what they do best. Basically, you can talk to 20 people in those offices, you will get 21 different answers and, in the end, it won't matter anyway, because "they are not responsible for...".

So now, we are making another trip to FRO, this time with our landlord, to explain why it took so long to submit the stupid C-form and to hear in return, how they can't help us because they can't.


In moment's like this, I often feel like I'm in one of the Kafka's novels with all its incomprehensible bureaucracy, illogical requirements and nightmarish, near-impossible quests.

...and all of that before we can even think of applying for visa extension, not to mention OCI!

Monday, April 25, 2016

Rescue mission aka Apothecary chest of drawers


After moving out from the huge villa into this tiny little cottage, we had to get rid of some furniture, especially the bigger pieces because, quite frankly, there was no space to put them in. But then I wouldn't be an old furniture junkie that I am if I didn't get this sad, eaten through and falling apart piece of trash.


That's usually how it goes - the worse condition they are in, the more I want them... It may have sth to do with confidence. I mean, if it's already garbage, I can't really spoil it - much less pressure on the renovation process.
I always admire people who attempt those "Ikea hacks" etc. on brand new stuff. Sure, it doesn't cost much, but if you completely ruin it, it's just wasteful. But with my odds and ends, I feel free to try all sorts of stuff and in the worst case scenario - no harm done.

We got this chest of drawers on a yard sale (Goa being very much season-driven has a lot of those pre-monsoon) and it turned out to be a termite nest. It's quite common actually, termites are quite a local plague! So, obviously, the first order of business was to move this party to the "better place". I had a similar problem with the trunk I did quite a while ago, so I used the same poison and let it do its magic.


It was pretty straight forward from there. I had to refill the bigger and most noticeable termite holes as well as remove weird resin piece someone used to repair the surface.


I decided on apothecary theme  - I don't really know what was it originally used for, but I like to imagine bunches of dried herbs, powdered roots and brown glass bottles and vials full of potions, elixirs and cordials. Plus I knew we will store our cosmetics and perfumes in there since my vanity was turned into a changing table...
While my wood refill was drying, I taped and painted all the drawers white.


I have to mention that I had very limited resources for this renovation. First of all, nearly all my crafty supplies are still in boxes and second - the shopping was done by my husband, so instead of sending him on a hell run through stationary and art shops, I just settled on good old hardware store - can of oil paint, turpentine and wood varnish.


I got some botanical prints  for my first furniture decoupage attempt (that's where the junk aspect of the furniture came in handy - I would never try it on a new piece). I imagine it works better if you use tissue paper and not a simple printout, but, on the plus side, I got the laser print so the color didn't bleed.


After sticking my herbs and flowers on, it became painfully obvious that the paper is whiter than the paint. I burrowed through some boxes, got to a few tubes of paints and played with the drawers a bit to make them less print looking. A dub on the leaf here and on the flower there, plus, I tried to hide the edge of the paper as well as the color difference. If you look closely, you can still see it - after all, the paper has its thickness, but otherwise it looks quite uniform.


The next step was the top of the chest. I used a stencil I found on Pinterest. Well... actually I just used it as a visual and sketched the whole thing.


Then - and I wouldn't recommend it to anyone with common sense - I realized I don't have any oils paints and proceeded to paint the "apothicaire" sign with black acrylic paint on the surface painted with glossy oil paint. Don't get me wrong, it can be done, but it will cost you... few white hair and two years of your life most likely.


After this nightmare was over, I covered the whole thing with transparent art varnish (the one you use for oil paintings, not furniture). I finished the drawers the same way because, as it turns out, only "transparent" wood varnish you can get around here is actually amber color.
I ended up using a very thin coat of it on the top surface, but, for some reason, applying art varnish under it makes it less noticeable.


When everything was nice and dry, I screw on the knobs I bought about hundred years ago because, well... they were so pretty that I simply had to have them. I just knew they will come in handy and  boy, was I right!


Wednesday, April 20, 2016

The flat the meringue and the best lemon curd


I think, I already mentioned that we finally bought a flat (YAY!!). That just shows you can never predict how things are going to turn out.
All this time, we were planning to get a place here - in Goa. We even made a downpayment on a flat, but then change our mind about the location so often that the project we landed on will be ready in about hundred years.

And then we went to Poland - completely preoccupied with the whole baby-having affair. Of course, the topic of us coming down more often came up, and with it the question of a place for us to stay (other than my parent's). Honestly, we didn't make any declarations, just randomly mentioned that we will one day, maybe, who knows - buy a small flat. But the cogs in the machine started moving and before I knew it we were picking tiles and paint colors and... I still can't believe we did it!

It was the first time when we hired people to do the work, made inspiration boards followed by lots of shopping and generally speaking - spent some money on the renovation. Even though I have a soft spot for interior "before and after's", I could hardly believe what a change it made. I said it before and I will say it again - paint is a very powerful tool!


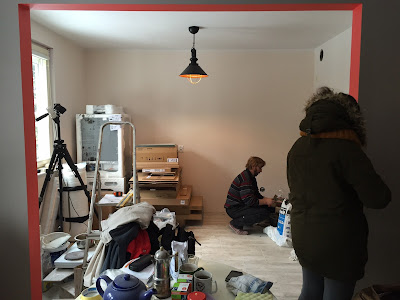
Anyway, we are back in Goa and finally managed to move to a darling little cottage. Now, I know that where I see charming, countryside and rustic, others may see a bit of a ruin, but it has so much potential and I love being back in my DIY shoes.

Plus, there is something about this place that makes me want to wake up at 5.30 in the morning, bake bread, make cottage cheese and attempt cooking things I usually just pick up in the store.
So, last night, I made lemon curd. It is absolutely delicious and not at all difficult to make. I don't think it took me more than 20  minutes - start to finish.


This recipe makes 1 jar full (plus few spoons to lick in extasy or proudly present to whoever is near you when you finish)
100g butter ( I used slightly salty)
1/4 cup sugar
4 egg yolks
1/2 cup lemon juice

Cream butter and sugar until fluffy. Mix in egg yolks - one at the time, until well incorporated. Continue mixing, while adding lemon juice slowly until everything is well combined.
Now warm up the mixture over boiling water (boil water in a pot, place mixing bowl on top of it so that it touches the water but not the bottom of the pot) whisking energetically - you don't want scrambled eggs!
First, its gonna melt, but after about 5 minutes it will start coming together. Curd is ready when it reaches the consistency of a thick sauce. It will thicken after refrigerating.

It is recommended to strain the curd before putting it in the jar to remove all the lumps. Quite frankly, after all, the mixing and whisking I didn't get any lumps but I had quite a few lemon seeds! So. Strain you curd! Whatever the reason.


Now, for the egg whites... meringues, obviously! I don't make them too often because then I', left with all the egg yolks, so I wasn't about to pass the occasion!

Side note: on one of my fav blogs with recipes that always work, I saw curd made using whole eggs, so you can still make your own curd,even if you have no use for leftover egg whites!


4 eggwhites
pinch of salt
200g sugar
1 tsp potato starch (I used cornstarch)
juice from a small lemon

Mix egg whites until just foamy and add salt. Now turn your mixer to high speed and mix until stiff. Turn to medium speed and add sugar one spoon at the time, until well incorporated. Still mixing, add starch and juice.
Place cookie size blobs (with a spoon or confectionery sleeve) on parchment paper and bake in 120 degrees for 70-80 minutes. Meringues should be dried more than baked - that's why they stay white or white-ish.
You can eat them as they are or with lemon curd, or, better yet, with lemon curd mixed with some mascarpone. Yum!!


Wednesday, April 13, 2016

chocolate cravings and banana bread


For some reason, I had close to none pregnancy cravings. It was lucky, I guess, but I was always curious about it. I mean, let's be honest, I do get cravings on a daily basis, so having a legitimate reason for once would be nice.

Anyway, one day back in Europe I woke up and decided: today is the day when I make banana bread. And that was the extent of it.
Normally I don't like bananas in anything but banana shakes - no banana pancakes, banoffee pie, and no banana bread. So I chucked it to a pregnancy craving, picked a random recipe from Pinterest and got to work. Of course, it turned out delicious and, of course, I didn't keep the recipe...


And here we are, a couple of months into motherhood, not pregnant in the slightest but the cravings continue. My latest thing is chocolate - shocking, I know. The thing is, I was never too much into chocolate cakes. Not that I don't like them, but I usually go for sth with whipped cream or butter frosting or caramel...
Once again, I opened Pinterest and picked "the best ever, oh so delicious, ah-mazing brownie" recipe. Well... it wasn't. It was too sweet, too oily and too flat with crystalized sugar on the top. It was nicely chewy though so we still ate half of it, but it wasn't satisfying chocolate experience at all. And that's when I started to think about that banana bread...
I went through like 10 different recipes trying to find the one I used before. In the end, I kind of mixed and matched and it turned out even better!

It is chocolate all the way! You can't taste bananas in it at all - great for me, cause, as I mentioned, I don't like bananas in cakes. (If you do, I would recommend adding some banana chunks to the batter.)
It's dense, not very sweet with a very deep, intense chocolate flavour from dark cocoa and coffee. I think I'll try it with a dash of chili next time!

Normally I would add chocolate chips and nuts (as mentioned in the recipe), but this time, I decided to utilize the not-so-ah-mazing brownie. I smashed it with a generous dose of dark rum and folded the crumbs into the batter - you can actually see it on the picture - the darker, denser dots. It gave the banana bread a kind of truffle quality and I absolutely loved it! Maybe not the point of screwing up another brownie just to put it into this bread, but if I ever have any stale cake left - I know what I'll be doing with it!


1 tsp baking soda
1/2 tsp salt
1 cup flour
2/3 cup unsweeten cocoa powder

3 -4 ripe bananas ( I used 6 Goan micro bananas)
60g melted butter
1/2 (or less) brown sugar
1 egg
1/2 cup super strong coffee

2/3 cup chocolate chips (optional)
1/2 cup chopped nuts (optional)
1 banana sliced (optional)

Sift flour, salt, soda and cocoa powder and set aside
Mix bananas, butter, and sugar with a blender. Add egg and coffee and whisk together. Add dry ingredients and stir until combine. Add chocolate chips or nuts or banana chunks (or all of the above) and fold it into a mixture.

Bake 40-50 min in 180. I like it more brownie-like, a little fudgy, so I start checking it with a toothpick around 30-35 min. It should have moist crumbs sticking to it - not a liquid batter. But if you prefer well-done bread - wait until it comes out clean.


Saturday, March 12, 2016

Pregnant in Paris - aka travelling in 3rd trimester


so... Paris, once again...
As I mentioned before (about a billion times), our trip was an unconventional one, planned and yet full of question marks. We bought tickets waaay in advance - understandable, considering the situation, but we had no idea how thing are going to go pregnancy-wise. Most of the airlines and doctors will allow you to fly till the end of 7th month, to avoid complications, but then again, being allowed to do sth and actually doing it are two different things, aren't they?
Of course, I did my research, as I always do, to see if there are any other crazy mothers to be, planning romantic excursions just before the due-date. Most od the "Paris pregnancy" articles were about moving to France while pregnant etc or having your last holidays in the very beginning of your pregnancy. I also found a lot of "avoid flying and longer trips in your third trimester" advices. Well... we already had the tickets so I decided to just wait and see what happens.
After not-so-encouraging reading material, I was a bit sceptical, but, at the same time, determined as hell to make the most of it. And it wasn't bad at all! It was actually pretty great.

First of all, we booked air-BnB, making sure it is 1. - near the metro station; 2. - more or less in the centre; 3. - has an elevator(!!!).


After a day of galleries, gardens and cobbled streets, the last thing you want to do is climb 5 cases of steep stairs, no matter how romantic it may seem to stay in one of those old Parisian attics.
As my feet started to swell on the day of our departure, I've noticed every step we had to climb, and there was no end to it. Forget Monte Martre or arc the triumph (yes, I did climb both!), stairs are everywhere! Metro stations, museums, galleries, gardens, shops... it may not seem like much to those with normal size feet, but after few hours in the softest ballet flats I was dreaming of crocks - yes, the ugliest shoes in the world!
So, if you are planning late pregnancy holidays - get yourself a pair of flip-flops or Uggs (or sth alike), depending on the season.

Second of all, your pregnant belly will work like a VIP pass nearly everywhere! I had some misgivings about blatantly using my "condition" to skip queues, use special entries and such, but it was such a comfort and time saver, I decided to screw missgivings and use it while I could.


Then there was a food conundrum. There is the whole list of things you are not supposed to eat while pregnant: seafood, pineapples, papayas, soft-boiled eggs etc. and then there is soft cheese, foie gras and wine... Apparently, it's safer to skip salads and red meet too.


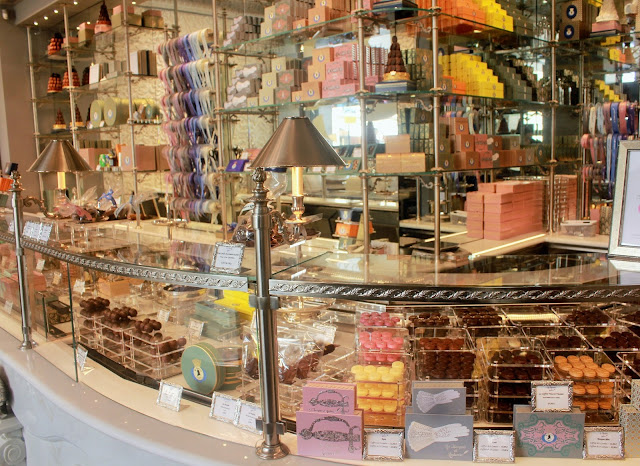
To cushion the blow of not trying some culinary staples, I concentrated on desserts and... snails. As far as I know they are safe to eat and oh-so-delicious! Plus a sip of red wine every now and then is supposed to be ok too. To be on a safer side, skip fresh fruits and veggies (unless you wash them yourself), shellfish, red meat and cheese and you are good to go. Honestly, with all the macarons, creme brulee, baba au rhum, you will barely notice that you are missing something!


when it comes to safety, we didn't face any difficulties. Only two things that come to mind are the metro crowd and pick-pockets. Metro can get super crowded at times, and even though people usually will give you a seat, there is a fair amount of pushing and shoving so whatch out for that. As for pick-pockets, it's a standard warning for every tourist around the globe. I would make extra sure that you are comfortable with your bag as guarding you documents and money can be more difficult with an XXL belly.


To sum it up, I think 3rd-trimester trip is a fab idea.
It takes your mind off the pregnancy/delivery stress, helps you refocus and gives you "a kick" of energy. It gives you a great opportunity to click your belly pics and document you pregnancy glow. Plus, who knows when will you have a chance for a "just the two of you" trip again? If you are tired or walking, there are cafes and parks everywhere, just sit and people watch with a macaron in hand!
If your doctor gives you a green light - go for it!