Showing posts with label food. Show all posts

Thursday, November 3, 2016

Vintage cookbook and the easiest apple pie


I have to confess, that even though I mostly bake (and cook) using recipes found online, I simply adore cookbooks. I don't have a huge collection, but there is a designated shelve holding all my treasures.
I have some of those beautiful, hardcover volumes with amazing pictures and very accessible "shortcut" recipes, but I also have a couple of my grandma's books with old time wording and very "frugal" titles. I don't usually attempt cakes calling for dozens of eggs, bushels, and quarts, but I have a few that are brilliant in their simplicity.
This apple pie is one of them. It's just handful of ingredients, mostly apples, and no fat. I mean... you can almost call it healthy! I definitely don't hesitate to eat it for breakfast.


Oldschool apple pie
1 kg apples
breadcrumbs (2-3 tbsp)
150-200 g sugar
4 eggs
250 g flour
1 tsp baking powder
vanilla essence
optional:
cinnamon
walnuts
raisins

Line the cake pan with baking paper and cover the bottom with the breadcrumbs. (The cake batter goes on top, so breadcrumbs "hold" the bottom of the pie).  Peel and roughly chop the apples and place them in the cake pan. Sprinkle with cinnamon, nuts, and raisins.
Mix the eggs with sugar until pale and creamy. Gently mix the flour with baking powder. Pour the batter over the apples. Bake at 170°C for 50-60  min (golden brown but soft).
Sprinkle with powdered sugar and enjoy!


Saturday, September 17, 2016

Autumn cooking - aka recreating family recipe


I always liked September. There is something in the air that brings back memories but also makes me want to prepare for a new beginning. I guess it's the beginning of the school year vibe, the trips to the stationary shops, buying new notebooks and pens and the absolute certainty that this year will be somehow different and better than the last. But it's also the smell of fallen leaves, first autumn rains, shorter days that make you want to cozy up with a cup of hot chocolate and the variety of fruits, nuts, and wild mushrooms...

Apparently, everyone gets sentimental this time of year because during one farmer's market trip my mom started reminiscing about mushroom appetizer her grandmother used to prepare.
Aside from the chanterelle bread spread, i didn't have much to go by, but after some experimentation, I got it just right! Or so I'm told...


Monday, August 15, 2016

Market day in Cracow


Farmers markets are becoming a new place to be, there is no question about that. However, it took several years in India for me to see the attraction of Cracow's old market.


 And I'm not alone! Both tourists and locals are flooding in and the market is keeping up well with the new fashion. Next to the seasonal fruits and veggies, new stalls opened up. You can find everything from fresh antipasti, Turkish soaps, spices from every corner of the world to organically grown grains and cold-pressed coconut oils and doggy treats.


On top of that, once a month you can enjoy kind of a market picnic with specially selected food, drinks, and some handmade items.


Living in Goa, I can't complain about the availability of fresh produce, but I did miss all the berries, homemade cheeses, and wild mushrooms.


I'm still planning a photographic visit, but till now I stayed true to the purpose of the place and only managed to click few pics, ladened with bags and bags of fruits and jars (hello preserve making season!).


I also discovered rather funny addition - a milk vending machine, where you can get a bottle of farm fresh milk anytime!


Sunday, July 10, 2016

fail-safe banana bread (guaranteed!)


Some time ago I was raving about chocolate banana bread. Well... Somehow, from the chocolate one I worked my way down to the plain old banana bread which I now love passionately! It's the easiest loaf cake in the world, and, what's more, it's absolutely impossible to screw up!

And here is the proof: I baked it changing proportions nearly every time according to what I had (or didn't have) in the fridge - it baked perfectly. Once or twice we had power break (aka the blackout - very common in India) mid-baking - it turned out perfectly. I made a cake mix out of it - it turned out perfectly (or so my husband who never baked a cake before tells me). I overloaded it with nuts and chocolate chips - it turned out perfectly.

It's moist, fluffy, cakey but also full of bananas so you can pretend it's healthy; you can make it with a fork and it takes about 5 minutes to whip up (plus the baking of course).


So here it is, the magic recipe!


4 big bananas - mashed with fork (best if they are overripe but not necessary)
50-100 g butter
1/4-1/2 cup sugar (i say the less the better, bananas will make it sweet - trust me)
1 egg
vanilla extract
1 tsp baking soda
pinch or two of salt
1,5 cup flour
nuts, chocolate chips, cranberries or whatever your heart desires!


Warm the oven to 180 degrees. Melt the butter. Mix in sugar (you can use a fork for the entire process) and add to the bananas. Mix in the egg and vanilla extract. If you are feeling ambitious you can combine dry ingredients before adding them to banana mixture, if not - just dump everything in and mix until combined. Lastly, mix in the nuts and raising if you are adding them. Pop in the hot oven for about 40-55 minutes.


Thursday, June 16, 2016

Delightful Amaretti


Ah, elusive macaron... And, yes, its macarons, not macaroons (macaroons are the spiky ones with shredded coconut) - as if I care. There is this mystic aura around them and for a good reason! It's not just about how enchanting they are. Quite frankly, sometimes I think it's not that at all! It's the making process, the nearly alchemical precision in every step: the ingredients, the mixing and whipping and folding and squeezing and drying... you name it!


Well... I tried it three times, didn't get the perfect result yet. I could say that there were extenuating circumstances, (the humidity, the ingredients and finally the fact that I burned the mixer half way through the third attempt... ) but, generally speaking, I'm not a macaron type of baker. I like to improvise, be messy and not very particular about the recipe. So, while I continue to admire the perfect pastel-colored cookie, and probably attempt to bake it every now and then, I usually turn to it's much more forgiving cousin: Amaretti.
It's a tiny, adorable and delicious cookie, perhaps not so elegant, but full of rustic charm. And so much easier to make! The concept is still te same: meringue base, almond meal, sugar; but you don't need to be Pierre Herme to get it right!


170 g ground almonds
150 g powdered sugar
2 eggwhites
15 ml amaretto (if you want to be extra fancy)

Mix almonds and sugar - I recommend pulsing it in your food processor
Whip the egg whites until stiff and fold in the almonds. If you are using amaretto - fold it in last.
You can use baking paper, baking mat or buttered cookie tray. Squeeze small cookies with confectionary sleeve or scoop with a spoon. They will grow a lot, so leave enough space in between.
Bake - now there is and either or to this step. If you want crispy, dry cookies, bake at 160 C for about 15 minutes (or a little longer), if you like more chewy and soft cookies, try 170 for 10 minutes

The truth is you just have to keep and eye on them. But they are delicious either way!

Wednesday, June 1, 2016

Magical meringue dessert


Ever since I discovered how ridiculously easy it is to make lemon curd, we have a fresh jar in the fridge pretty much every week. But, quite frankly, I wouldn't be myself if I kept making the same recipe over and over again. I mean, cooking should be fun, shouldn't it? Otherwise, it's just a chore, and there is nothing magical about chores. And where there is dessert, there has to be magic, otherwise, it's just sugar, and you can as well go to the store and get yourself a candy bar.


And so, the passionfruit curd was born, and with it the absolutely incredible meringue mascarpone dessert!

The recipe is pretty much the same as in Lemon curd so I won't go into the details of it.


Passionfruit curd
100g butter ( I used slightly salty)
1/4 cup sugar
4 egg yolks
1 cup of passionfruit with seeds or 1/2 cup strained
1 tbsp lemon juice

Cream butter and sugar until fluffy. While mixing add egg yolks and then fruits until everything is well combined.
Place the bowl over boiling water and whisk energetically until mixture starts to thicken - about 5 minutes.
Strain you curd (or not, if you like the crunch)
Refrigerate overnight


Meringue
4 eggwhites
pinch of salt
200g sugar
1 tsp potato starch (I used cornstarch)
juice from a small lemon


Mix egg whites until just foamy and add salt. Now turn your mixer to high speed and mix until stiff. Turn to medium speed and add sugar one spoon at the time, until well incorporated. Still mixing, add starch and juice.
On parchment paper, form three circles - you can draw them on the paper using a plate as a template and fill with the meringue mixture. If you can manage to make the edged a little higher - even better! Bake in 120 degrees for 70-80 minutes. Cool in slightly open oven.


For the dessert, you will need:
1/2 jar of passionfruit curd - strained, plus some leftover seeds
1 packet of mascarpone (300-400g)
3x Meringue base


The rest is simple (not that the previous preparations were complicated):

Whisk or mix (but don't overmix!) mascarpone and curd. Spread half of it on the first meringue base, cover with the second. Mix seeds and remaining mascarpone mixture and spread on the second base - cover with the third. Sprinkle with curd. Refrigerate for at least an hour.


And then let the magic happen...


Saturday, May 14, 2016

Passion for yogurt & granola


Lately, I'm really into homemade dairy products. I'm not buying a cow or anything, but I do make cottage cheese and faux mascarpone on a daily basis. It was only natural, that I tried my hands on some home-made yogurt.

To be completely honest, I don't think I'll be repeating the experiment in a hurry, but only because we can get delicious, all natural yogurt in the local store at a comparable price.
From what I've read, it's quite tricky to get real yogurt with no funny additives but with natural cultures nowadays. I'm in no way nutrition expert so all I'll say here is: study the labels!

The best way to make your own yogurt is, of course, to get the bacteria cultures, but you can make do with a spoonful of good natural yogurt and some milk!
The key is temperature, all the rest is just waiting.


Home-made yogurt
1/2 liter milk
2-3 spoons of natural yogurt with bacteria cultures

Warm the milk to approx. 40 degrees (warm but not hot) and mix with yogurt. Keep it warm for 7-8 hours or overnight. Ideally, it should be left in 30-degree temperature.

As far as I know, there are some devices for home yogurt making, but I'm not so committed to this task to own, or even research one. You can leave it in a barely warm oven, on the balcony (if it's warm and sunny), wrap it in a blanket, pour into warm thermos etc.

Once it's ready keep it in the fridge. Of course, you can double or triple the ingredients- I read somewhere that home-made yogurt will last up to two weeks!
Oh, and you can make next one or two batches from this one, later on, you have to get the store bought yogurt again.


While I'm happy with store bought yogurt, I'm completely obsessed with home-made granola. It's my biweekly ritual to prepare a huge jar for our breakfasts and guilt-free snacks

Because I make it so often, I change the proportions and ingredients - and you can do the same - but here is the basic recipe:

400 g oats
100-200 g seeds (sunflower, pumpkin, sesame,  etc)
100-200 g chopped nuts (walnuts, almonds, hazelnuts etc)
100 g desiccated coconut (or other nuts)
150 g liquid honey (or sugar syrup)
2-3 spoons oil (sunflower, almond, coconut etc)
150 pureed apple

+ 100-200 g dried fruits (raisins, goji berry, cranberry etc)

Mix everything (apart from dried fruits) together until it forms rough crumbs. Spread evenly on baking parchment and bake 30-40 min in 160 degrees.
Everything should be golden-brown, dry and crunchy.
Cool it down, mix in dry fruits and store in a tight lid container for a couple of weeks.


And now, when you have both your yogurt and granola, try it with some passion fruit!

Wednesday, April 20, 2016

The flat the meringue and the best lemon curd


I think, I already mentioned that we finally bought a flat (YAY!!). That just shows you can never predict how things are going to turn out.
All this time, we were planning to get a place here - in Goa. We even made a downpayment on a flat, but then change our mind about the location so often that the project we landed on will be ready in about hundred years.

And then we went to Poland - completely preoccupied with the whole baby-having affair. Of course, the topic of us coming down more often came up, and with it the question of a place for us to stay (other than my parent's). Honestly, we didn't make any declarations, just randomly mentioned that we will one day, maybe, who knows - buy a small flat. But the cogs in the machine started moving and before I knew it we were picking tiles and paint colors and... I still can't believe we did it!

It was the first time when we hired people to do the work, made inspiration boards followed by lots of shopping and generally speaking - spent some money on the renovation. Even though I have a soft spot for interior "before and after's", I could hardly believe what a change it made. I said it before and I will say it again - paint is a very powerful tool!


Anyway, we are back in Goa and finally managed to move to a darling little cottage. Now, I know that where I see charming, countryside and rustic, others may see a bit of a ruin, but it has so much potential and I love being back in my DIY shoes.

Plus, there is something about this place that makes me want to wake up at 5.30 in the morning, bake bread, make cottage cheese and attempt cooking things I usually just pick up in the store.
So, last night, I made lemon curd. It is absolutely delicious and not at all difficult to make. I don't think it took me more than 20  minutes - start to finish.


This recipe makes 1 jar full (plus few spoons to lick in extasy or proudly present to whoever is near you when you finish)
100g butter ( I used slightly salty)
1/4 cup sugar
4 egg yolks
1/2 cup lemon juice

Cream butter and sugar until fluffy. Mix in egg yolks - one at the time, until well incorporated. Continue mixing, while adding lemon juice slowly until everything is well combined.
Now warm up the mixture over boiling water (boil water in a pot, place mixing bowl on top of it so that it touches the water but not the bottom of the pot) whisking energetically - you don't want scrambled eggs!
First, its gonna melt, but after about 5 minutes it will start coming together. Curd is ready when it reaches the consistency of a thick sauce. It will thicken after refrigerating.

It is recommended to strain the curd before putting it in the jar to remove all the lumps. Quite frankly, after all, the mixing and whisking I didn't get any lumps but I had quite a few lemon seeds! So. Strain you curd! Whatever the reason.


Now, for the egg whites... meringues, obviously! I don't make them too often because then I', left with all the egg yolks, so I wasn't about to pass the occasion!

Side note: on one of my fav blogs with recipes that always work, I saw curd made using whole eggs, so you can still make your own curd,even if you have no use for leftover egg whites!


4 eggwhites
pinch of salt
200g sugar
1 tsp potato starch (I used cornstarch)
juice from a small lemon

Mix egg whites until just foamy and add salt. Now turn your mixer to high speed and mix until stiff. Turn to medium speed and add sugar one spoon at the time, until well incorporated. Still mixing, add starch and juice.
Place cookie size blobs (with a spoon or confectionery sleeve) on parchment paper and bake in 120 degrees for 70-80 minutes. Meringues should be dried more than baked - that's why they stay white or white-ish.
You can eat them as they are or with lemon curd, or, better yet, with lemon curd mixed with some mascarpone. Yum!!


Wednesday, April 13, 2016

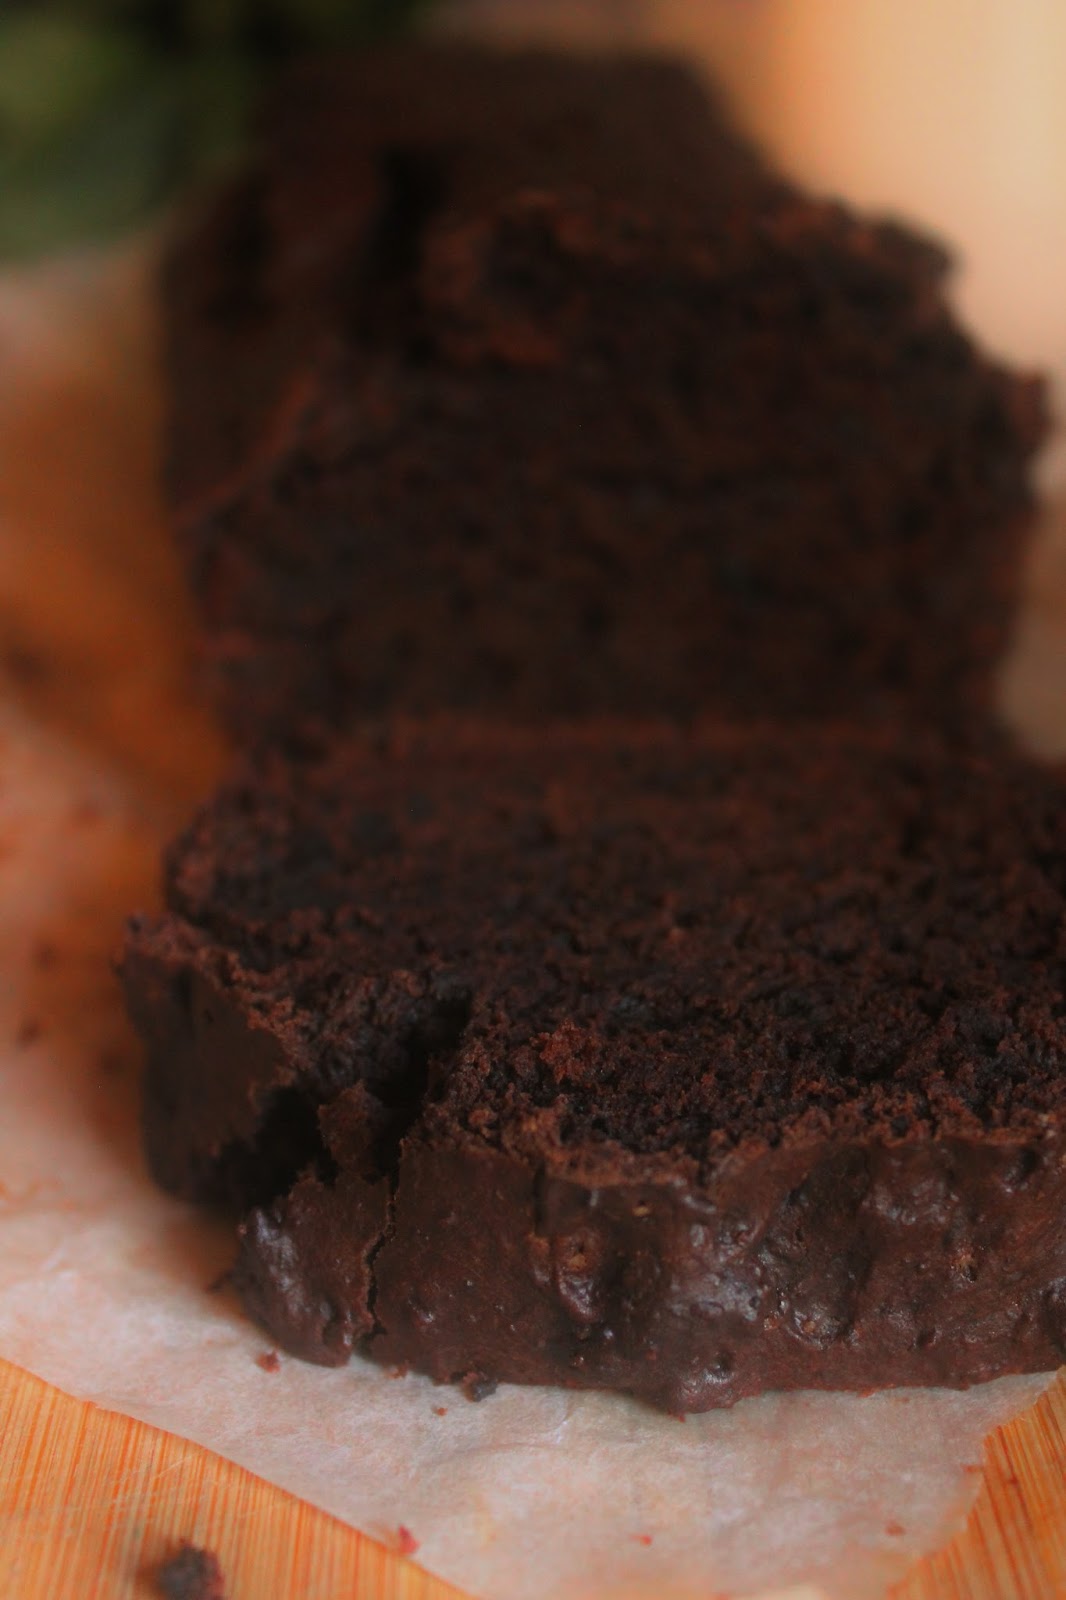
chocolate cravings and banana bread


For some reason, I had close to none pregnancy cravings. It was lucky, I guess, but I was always curious about it. I mean, let's be honest, I do get cravings on a daily basis, so having a legitimate reason for once would be nice.

Anyway, one day back in Europe I woke up and decided: today is the day when I make banana bread. And that was the extent of it.
Normally I don't like bananas in anything but banana shakes - no banana pancakes, banoffee pie, and no banana bread. So I chucked it to a pregnancy craving, picked a random recipe from Pinterest and got to work. Of course, it turned out delicious and, of course, I didn't keep the recipe...


And here we are, a couple of months into motherhood, not pregnant in the slightest but the cravings continue. My latest thing is chocolate - shocking, I know. The thing is, I was never too much into chocolate cakes. Not that I don't like them, but I usually go for sth with whipped cream or butter frosting or caramel...
Once again, I opened Pinterest and picked "the best ever, oh so delicious, ah-mazing brownie" recipe. Well... it wasn't. It was too sweet, too oily and too flat with crystalized sugar on the top. It was nicely chewy though so we still ate half of it, but it wasn't satisfying chocolate experience at all. And that's when I started to think about that banana bread...
I went through like 10 different recipes trying to find the one I used before. In the end, I kind of mixed and matched and it turned out even better!

It is chocolate all the way! You can't taste bananas in it at all - great for me, cause, as I mentioned, I don't like bananas in cakes. (If you do, I would recommend adding some banana chunks to the batter.)
It's dense, not very sweet with a very deep, intense chocolate flavour from dark cocoa and coffee. I think I'll try it with a dash of chili next time!

Normally I would add chocolate chips and nuts (as mentioned in the recipe), but this time, I decided to utilize the not-so-ah-mazing brownie. I smashed it with a generous dose of dark rum and folded the crumbs into the batter - you can actually see it on the picture - the darker, denser dots. It gave the banana bread a kind of truffle quality and I absolutely loved it! Maybe not the point of screwing up another brownie just to put it into this bread, but if I ever have any stale cake left - I know what I'll be doing with it!


1 tsp baking soda
1/2 tsp salt
1 cup flour
2/3 cup unsweeten cocoa powder

3 -4 ripe bananas ( I used 6 Goan micro bananas)
60g melted butter
1/2 (or less) brown sugar
1 egg
1/2 cup super strong coffee

2/3 cup chocolate chips (optional)
1/2 cup chopped nuts (optional)
1 banana sliced (optional)

Sift flour, salt, soda and cocoa powder and set aside
Mix bananas, butter, and sugar with a blender. Add egg and coffee and whisk together. Add dry ingredients and stir until combine. Add chocolate chips or nuts or banana chunks (or all of the above) and fold it into a mixture.

Bake 40-50 min in 180. I like it more brownie-like, a little fudgy, so I start checking it with a toothpick around 30-35 min. It should have moist crumbs sticking to it - not a liquid batter. But if you prefer well-done bread - wait until it comes out clean.